Show your loved ones your devotion with these Victoria sponge hearts! With all the flavor of a real heart and none of the mess, these scrumptious snacks are topped with a candy butterfly to mimic the effects of Joy!
Ingredients (Makes 6-8 Large Sponges, 8-12 Butterflies)
Victoria Sponge Cake:
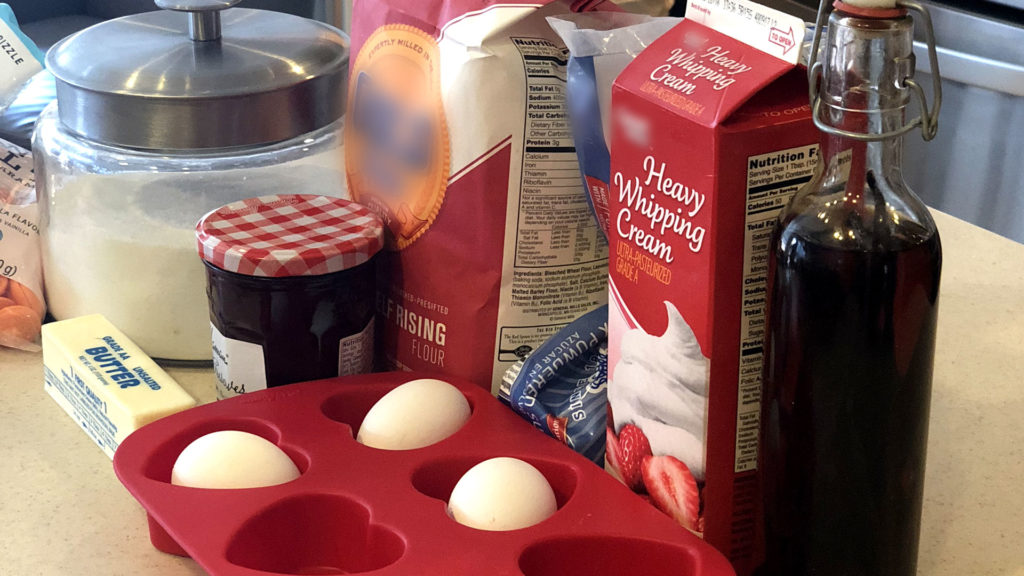
- 3/4 cup of unsalted butter, at room temperature
- 3/4 cup of caster sugar
- 3 large eggs
- 1 tsp vanilla extract
- 3/4 cup self-rising flour, sifted
- Strawberry jam or preserves
- OPTIONAL: A pinch of powdered sugar
Whipped Cream:
- 1 cup heavy cream
- 1 tbsp powdered sugar
- A splash of vanilla extract
Candy Butterflies:
- 1 8 oz package of brown candy melts
- 1 8 oz package of candy melts in your preferred colors (we recommend orange and blue)
- OPTIONAL: A printed butterfly stencil or photograph to use as a guide
Directions
To Make the Victoria Sponges
1. Preheat the oven to 350 degrees fahrenheit. Grease the interiors of a heart-shaped cupcake tin.
TIP: We used a six-cupcake tin, which produced a standard sized cake. For smaller cakes, use an eight or twelve-cupcake tin.
2. In a large mixing bowl, cream the butter and sugar until fully combined.
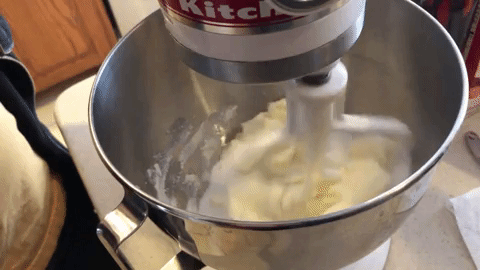
3. Add the eggs to the butter and sugar one at a time, and mix thoroughly. Add the vanilla extract.
4. Carefully add the self-rising flour to the wet mixture, and stir until fully combined into a smooth batter.
5. Pour the batter evenly into each cup in the cupcake tin.
6. Bake at 350 degrees for 15 minutes, or until a toothpick comes out clean.
7. Allow the cakes to cool in their tin for 5 minutes, before transferring to a wire rack to cool completely.
TIP: To ensure the sponge firms up, cover the sponges and place in the fridge for a couple hours. This will make it easier to cut them evenly.
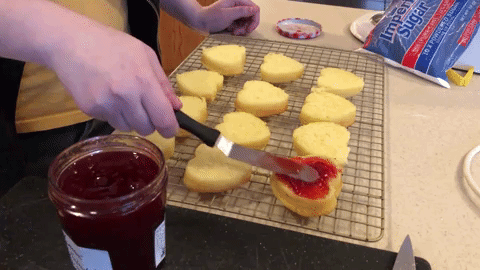
8. If necessary, use a serrated knife to remove the rounded tops of the cakes, then cut each cake in half.
9. Spread the bottom half of each cake with a layer of strawberry jam or preserves.
10. To make the whipped cream, combine heavy cream and powdered sugar, then beat until light and fluffy.
11. Pipe or spoon the whipped cream on top of the jam layer.
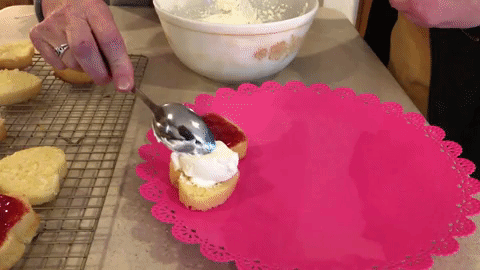
12. Sandwich the two halves together.
To Make the Candy Butterflies:
1. To make the candy butterflies, melt the candy melts as instructed on the packaging. If the candy hardens during the construction process, reheat as needed.
2. Transfer each color to its own piping bag.
3. Fold a piece of parchment paper in half, then unfold and spread on a flat surface. Using the brown candy melt, pipe the outline of a butterfly, with the wings on either side of the paper crease.
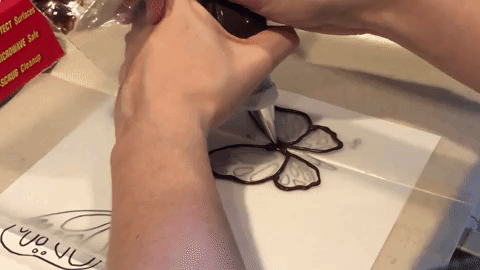
4. Pipe a straight line down the middle of the parchment crease to form the body, with two thinner offshoots at the top for the antenna.
5. Fill in the butterfly with the colored candy melts, in whichever combination you’d prefer.
TIP: Feel free to get creative with your butterfly designs! Try piping thin lines or spots on the wings, or take a toothpick and use it to swirl some of the outline into the colors! You can even fold the parchment paper in half to create a more abstract pattern!
6. Allow the candy melt to harden, then carefully separate from the parchment paper.
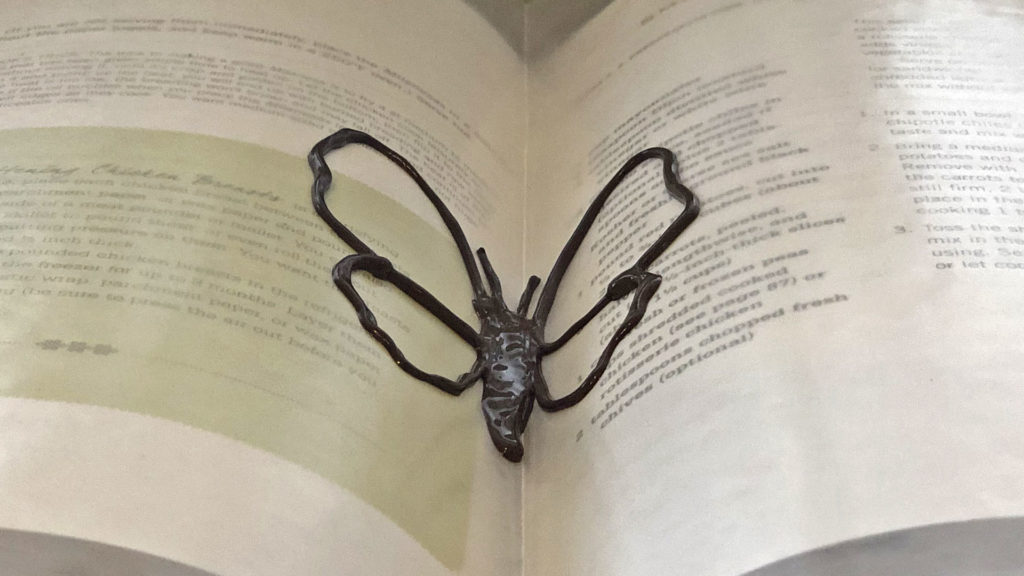
TIP: To give the butterflies more pronounced dimension, place the parchment paper crease within the pages on an open book or magazine.
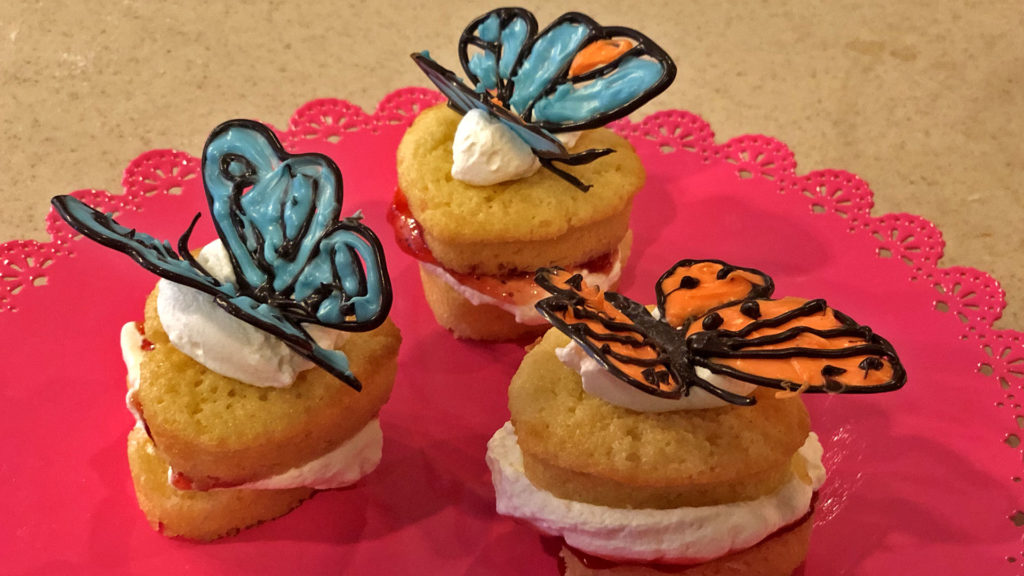
7. Top the Victoria sponges with a butterfly!
TIP: If the butterfly breaks down the middle, carefully press the wings into the Victoria sponges, then pipe a clean brown line in the space between them to maintain the look of a butterfly.
Compulsion Games has released a developer update video detailing what’s to come for We Happy Few, including a glimpse at the second playable character, Sally.
We Happy Few is now content complete, and the team is taking more time to polish following some major improvements to the beginning of Arthur’s story line. As such, We Happy Few will now release in Summer 2018 for Xbox One, PC, and PlayStation 4.
“There are these moments that are memorable, very funny, and super weird and we’re really excited to show you all” says Sam Abbott, Producer for We Happy Few. “But we felt that the first two hours of Arthur’s story just didn’t live up to those moments, meaning that the game didn’t start as well as it should. So we went back to the drawing board and made a couple of big decisions: we brought forward a number of story moments, to get into the action faster, and also rebuilt the whole first island for Arthur.”
Since its early days as a crowdfunding digital success, We Happy Few has continued to expand. With the help of Gearbox Publishing, its scope has been increased to include a full-length story campaign, three playable characters, and more than 250 unique encounters.
Compulsion Games and Gearbox Publishing will continue to provide weekly updates about the progress of the game.
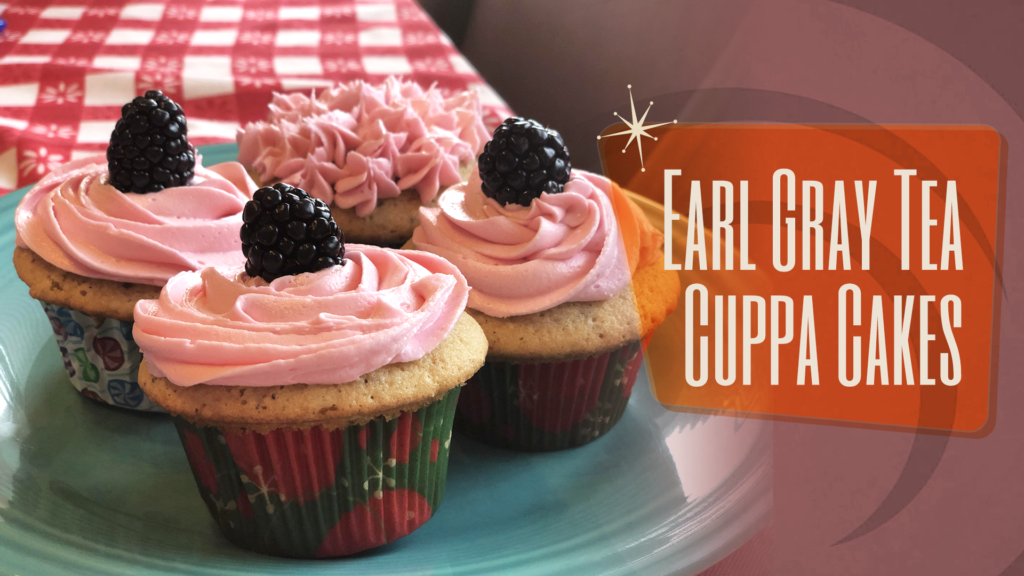
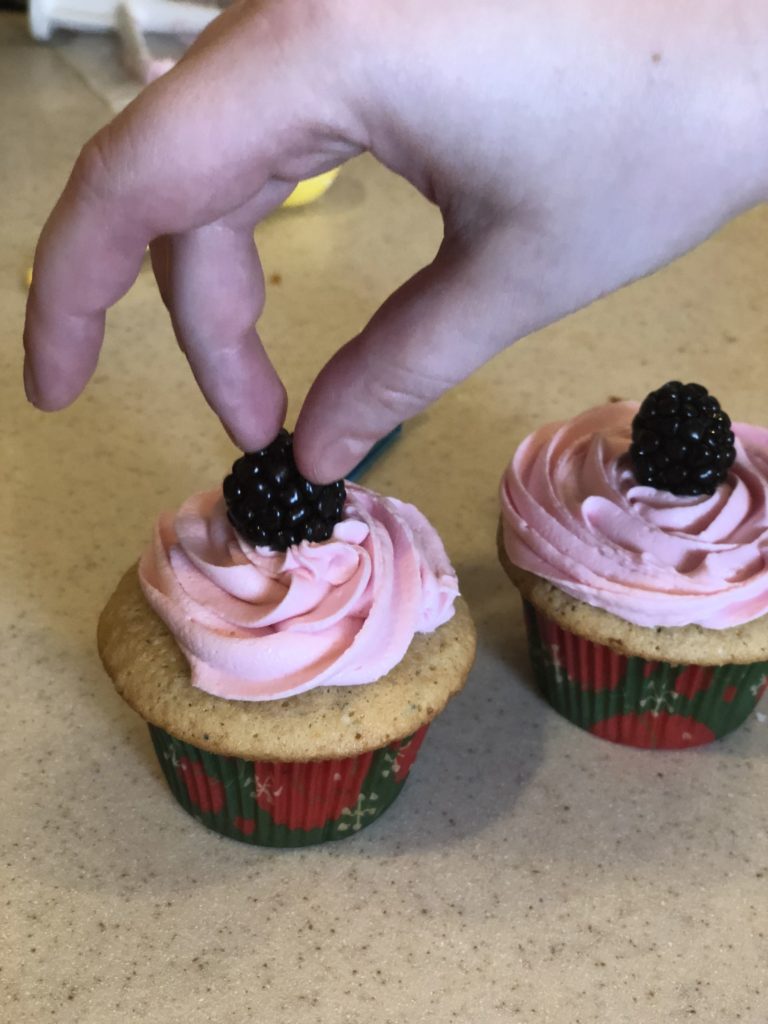
Tea – it’s the preferred drink of every good Wellie! But why just drink tea when you can eat it too? Serving these Earl Grey tea cupcakes with Blackberry frosting will prove your loyalty to the ideals of Wellington Wells.
INGREDIENTS (Makes 12 Cupcakes)
Earl Grey Tea Cupcakes:
- ½ C. whole milk
- ½ tsp. vanilla extract
- 2-4 bags of your preferred brand of Earl Grey tea
- ½ tbsp. finely ground Earl Grey tea leaves
- 1 ½ C. all-purpose flour
- 1 ¼ tsp. baking powder
- ¼ tsp. salt
- 1 C granulated sugar
- 2 large room temperature eggs
- ½ C. room temperature unsalted butter
Blackberry Frosting:
- 1 cup room temperature unsalted butter
- 4 cups sifted powdered sugar
- ½ cup blackberries
- 1 tsp lemon juice
- Pinch of salt
DIRECTIONS
1. In a small saucepan, heat the milk to a low-medium heat.
2. Remove the saucepan from the heat, and add the Earl Gray tea bags to steep for 20 minutes.
3. After the milk has been properly infused with delightful tea flavor, remove the bags from the saucepan.
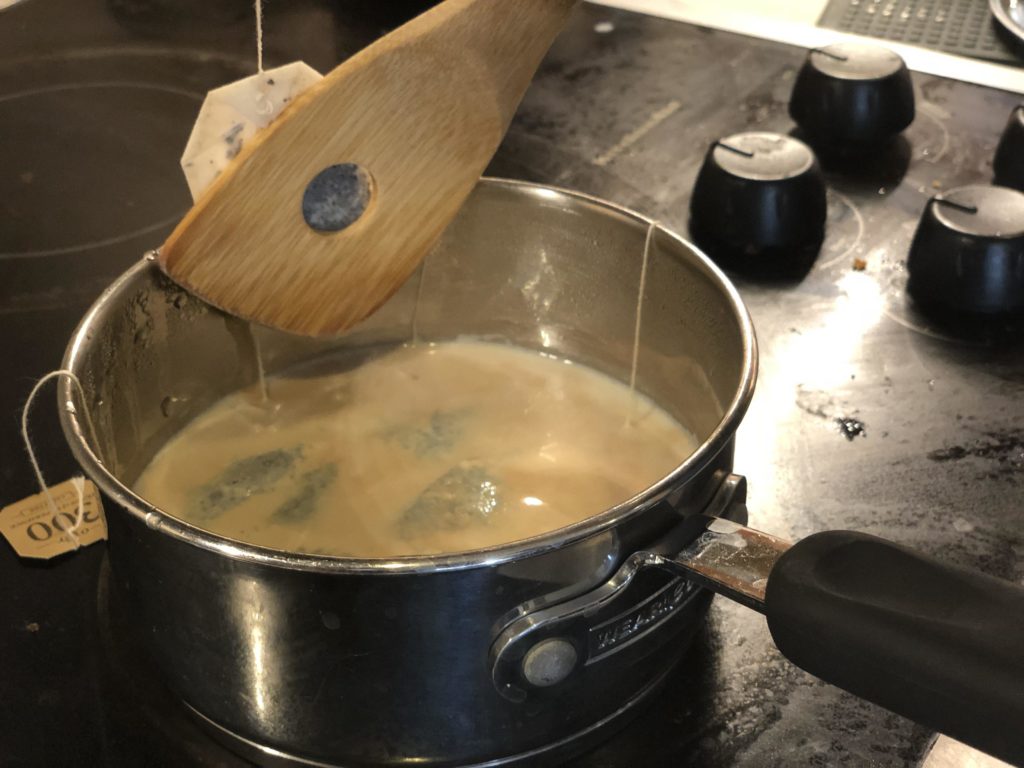
TIP: Squeeze out the tea bags as much as you can to maximize the tea flavor!
4. Pour the milk/tea mixture into a cup and add or pour out milk as needed to equal 1 cup of liquid. Let cool to room temperature.
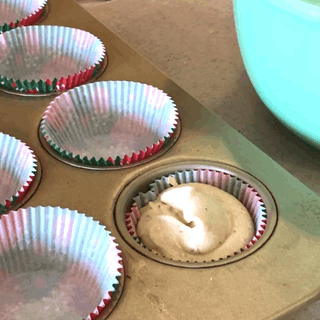
5. Preheat the oven to 350°F, and line a cupcake pan with liners.
6. In a large mixing bowl, combine flour, tea leaves, salt, and baking powder.
TIP: Be sure to thoroughly sift the flour with the other ingredients. Clumpy or poorly mixed flour will result in dense cake.
7. In a separate bowl, mix butter and sugar with an electric or stand mixer until fully combined, roughly 5 minutes.
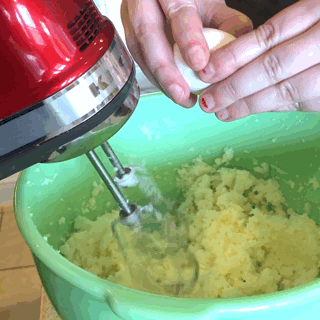
8. Add the eggs into the combined butter and sugar one at a time and fully integrate them into the mixture. Mix in the vanilla extract as well.
9. Carefully add the dry mixture to the wet mixture, and add the tea milk. Thoroughly mix all three mixtures together until they form a batter.
TIP: In order to prevent excessive clumping or general mess, combine the dry mixture and wet mixture in small increments, adding the tea milk throughout.
10. Pour the cake batter into the cupcakes liners, and bake at 350°F for 20-25 minutes or until a toothpick comes out clean.
11. Cool on a wire rack until ready to frost.
12. To make the blackberry frosting, blend the fresh blackberries in a food processor, and strain the puree through a fine mesh strainer to separate out the seeds.
13. In a separate bowl, beat the butter with an electric mixer for roughly one minute, then reduce the speed to low and combine the sugar, lemon juice, and blackberry puree with the butter. Increase the mixer speed and continue to whip the frosting until it’s smooth and fluffy. Spread generously on your cuppa cakes!